Based on White Wolf's tabletop roleplaying game, Vampire: The Masquerade, the eponymous video game franchise had a somewhat rocky start. Despite a mixed reception and disappointing sales figures, the series somehow managed to establish its presence within the community, passively gaining a steady follower base over the years. While the latest installment delivered by Big Bad Wolf Studio builds on the content of its predecessors, Vampire: The Masquerade - Swansong's puzzles often leave fans wondering how to progress further into the game. One such confounding instance draws inspiration from the tragic fate of Oedipus.
Much like previous installments, Swansong does not shy away from expanding on the overarching stories of its three protagonists by incorporating various head-scratching moments into the core gameplay. In fact, the game's supernatural setting nearly hinges on elusive lock-and-key types of puzzles, which seldom provide players with clues on how to proceed. A good example of Swansong's convoluted design appears during Scene 7 when Leysha pays a visit to the Red Salon in hopes of learning more about Dr. Richard Dunham's whereabouts.

After acquiring the Staff keycard and gaining access to the basement level of the Red Salon, Leysha will come across a white corridor with two rooms that might seem out of place. While both conveniently hide clues to a multilayered puzzle present in the area, players should postpone their visit to the room at the far end and consider entering the one to the right first. Doing so will take Leysha to Dr. Richard's office, where gamers would do well to inspect the glaring computer screen found on the good doctor's desk.
Upon interacting with the old computer, players will get to view Dr. Richard's observations on the interpretation of dreams, in which he fervently claims that Freud's work needs to be read in a particular order. According to his notes, readers should consult with Volume V before perusing additional information in Volumes III and IV, respectively. The second page of his observations contains a cryptic message stating that the myth of Oedipus will reveal a solution to the one who can interpret it.
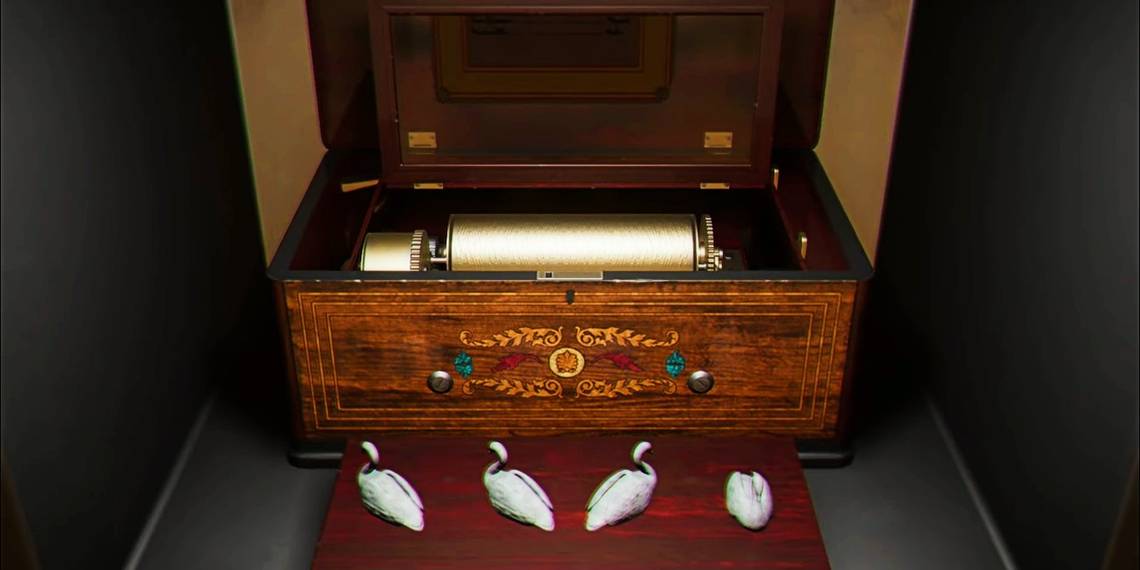
To make sense of Dr. Richard's unusual musings, Leysha can utilize the gleaned knowledge in the room at the far end of the white corridor. Within its confines lie several objects of interest, including four paintings depicting Oedipus' perils and a large bookshelf. Interacting with the bookshelf will allow the players to inspect Freud's work by pulling different Volumes. Following the previously noted V-III-IV sequence will unveil the second layer of the puzzle. Leysha can then proceed with her investigation by solving the mystery of the music box and the four swiveling swans.

If the players have not discovered the tape recorder in one of the rooms, they can turn their attention to the four Oedipus paintings for contextual information and visual cues instead. Since each corresponds with the direction the swans in the puzzle should face, taking a closer look at Oedipus' hands and his gaze will reveal the correct directional input. Starting from the far left-hand side, arranging the swans to face west, southwest, south and southeast will complete the puzzle and unlock the door that barred Leysha from learning more about Dr. Richard.
Exploring the remainder of the Red Salon before passing the threshold to uncover the contents of the hidden room is highly recommended, as the sequence marks a point of no return. By entering the premises via controller prompt, the game will inevitably progress the scene towards the end, bringing any unfinished side objectives to a quick close.