While One Piece's Thriller Bark arc is not perfect by any means, there's still a lot to enjoy about the haunted tale. The spooky, frightful atmosphere of Thriller Bark feels right out of Tim Burton's Nightmare Before Christmas and Brook is easily one of the most fun Straw Hat Pirates ever introduced, and his backstory is nothing if not heartbreakingly tragic. Yet, Thriller Bark's most vital point as a One Piece arc is how well it pulls off a team-based fight.

During the final act of the arc, Luffy's shadow is taken by Gecko Moria and then fused with Oars -- an ancient giant corpse. This eventually leads to the Straw Hat Crew needing to defeat both Oars and Moria. The task is quite a tall order as Oars is nearly 220ft tall, and being a zombie, he can't feel pain, which makes him incredibly difficult to damage. After absorbing Luffy's shadow, Oars combines the Straw Hat Captain's fighting prowess and spirit, making this the teams' most challenging fight yet. Plus, Oars' sheer size and power are the perfect ingredients for a Straw Hat Pirates team-fight that feels like a Final Fantasy boss.
Team-based fights are not uncommon in shonen but can easily fall apart if not executed well. The problem with team-based battles is balancing multiple characters at once and effectively tagging them in and out with fluid teamwork in a way that's still easy to follow. Even with seven Straw Hat members, nothing is lost in the chaos of the fight. Despite the crew initially stumbling as they are unaccustomed to facing such an oversized -- and surprisingly nimble -- opponent, they eventually start to key in on Oars weaknesses the more they confront him.

Multiple moments throughout this fight, we see coordination and teamwork on display with the Straw Hats. Early on, they attempt to knock over the Oars, and each crew member plays a part. Usopp uses an oil slick to make Oars' hand slide off the ground. Robin uses her devil fruit powers to hold back Oars' other hand while Zoro, Franky and Chopper all strike to make him dizzy. The synergized move is finished off with Sanji sweeping at Oars' leg to knock him off balance.
One-on-one fights are often favored, but this well-coordinated team attack is one of the earliest examples in One Piece of the Straw Hats acting as an effective unit instead of individuals. Still, that does not mean their strengths are underutilized. Later in the fight, Chopper sneaks on top of Oars to examine his body and realizes that the giant's cause of death was frostbite. The reindeer's medical knowledge helped the crew understand a fundamental weakness of Oars, which is what they exploit to defeat him later on.

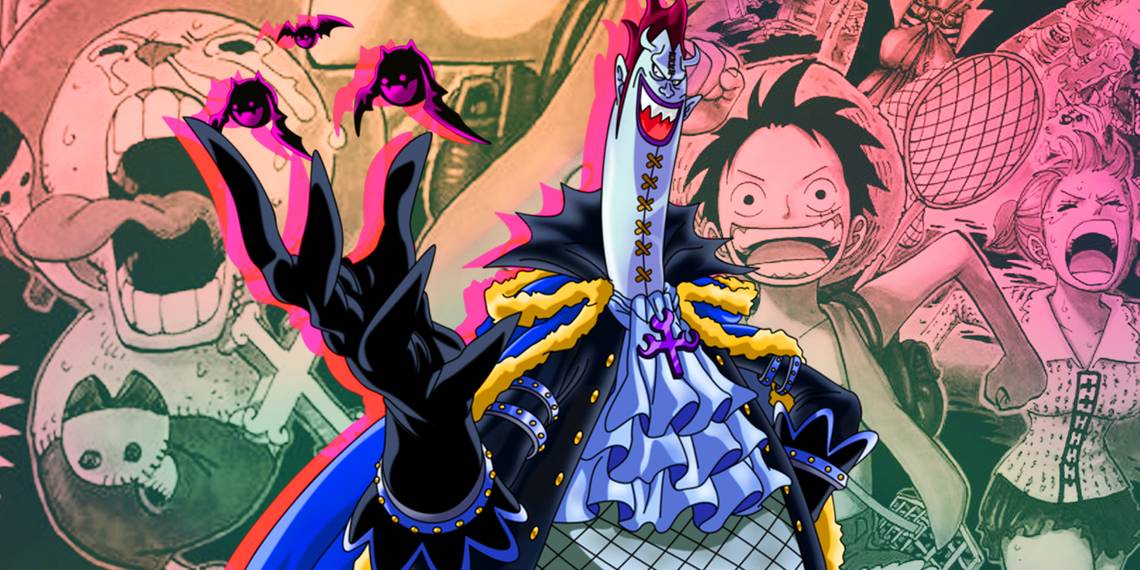
This multi-stage fight continues as Moria arrives and begins controlling Oars from a cockpit in his stomach. Moria uses his Shadow Shadow Devil Fruit powers to vastly improve the giant's fighting style. By manipulating Oars' shadow with his Doppleman, Moria can contort the giant's body to match that shadow -- allowing Oars to stretch like Luffy. Now facing a massive version of their captain, the Straw Hats are momentarily outmatched until Luffy finally arrives in a dark new form.
Despite Luffy stepping up, this boost comes from the Rolling Pirates putting 100 shadows in Luffy, essentially using Moria's Devil Fruit rules against him. Each shadow gives Luffy the owner's experiences, technique, and strength, combining the efforts of many into one person. While Luffy's Nightmare form doesn't last the duration of his fight against Oars and Moria, it sets the stage for yet another tightly choreographed moment of teamwork as the nine Straw Hat Pirates work together to hinder the ancient giant.
In a moment even more indicative of One Piece's expert navigation of team battles, everyone is once again given a chance to shine and use their strengths towards a common goal. From Nami creating a rainstorm to Franky and Usopp's ingenuity using Thriller Bark's plumbing pipes to blow cold air on Oars to freeze his lower half, the entire crew steps up. While Luffy lands the decisive blow after using Third Gear to inflate his fists' size to smash Oars' face, it's from their combined efforts that they're able to incapacitate the giant by crushing his spine, causing him to collapse. It's a perfect testament to the teamwork and resolve of this merry band of pirates.

Although they still face Gecko Moria after Oars' defeat, a heartwarming final battle comes afterward when Bartholemew Kuma makes his appearance. The warlord's sudden appearance is worth noting because he's after Luffy, who happens to be unconscious after his bout with Moria. So, unlike most One Piece arcs that end with Luffy facing the final antagonist to protect his crew, this time, it's his crew facing the antagonist to defend him.
It's such an excellent way to conclude an arc about loyalty, commitment and what it means to rely on your Nakama. Both Sanji and Zoro are willing to give their lives to save Luffy. Zoro even takes all of Luffy's pain that Kuma extracted to save his captain, proving he's still the most loyal first mate a captain could ask for.
Thriller Bark is not without its faults -- looking at you, Absalom -- but it manages to pull off one of the most thrilling final battles in all of shonen and one that utilizes the combined strengths of its main characters. The Thriller Bark arc proved something that still holds true 13 years later in Wano, the Straw Hat Pirates of One Piece are the best team out there.