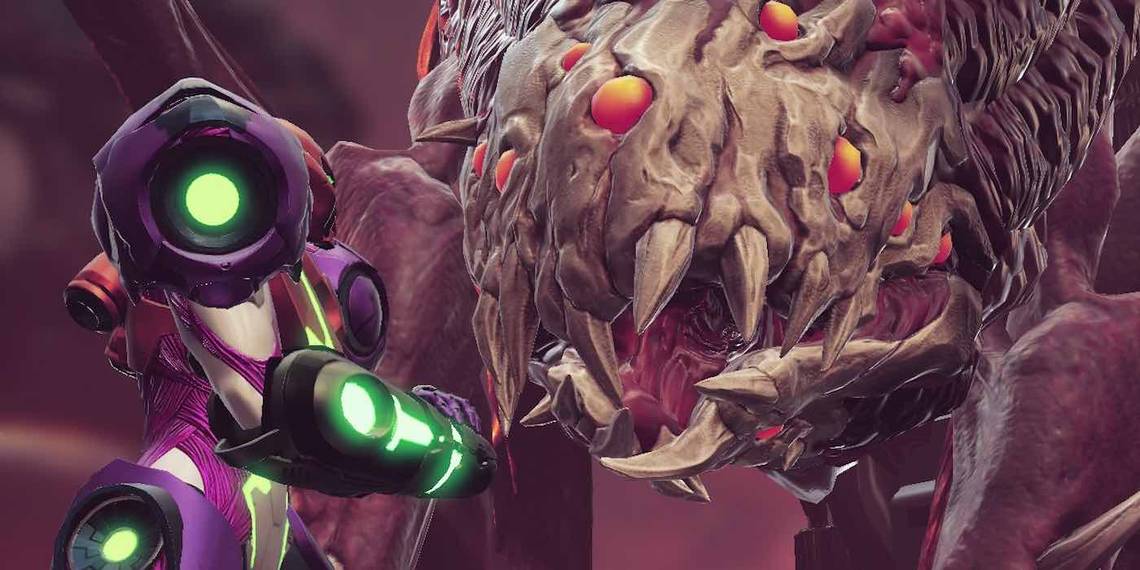
Samus encounters Metroid Dread boss Experiment No. Z-57 in Cataris, formerly occupied by the Space Pirate Kraid, when she revisits the region. This mutant creature is to blame for the massive cooling problems that have prevented Samus from fully exploring recent areas. Once she defeats Z-57, Samus can return to the specified Artaria Network Station as requested by ADAM. With newfound access to areas previously blocked by ice, Samus can continue her extermination of the E.M.M.I. units that hunt her.
The fight against Experiment No. Z-57 will require a wide range of Samus' abilities, from her newly acquired space jump to the Storm Missiles she earned defeating Escue. The goal is to destroy all four of Z-57's secondary limbs while dealing as much damage to the head as possible. While the monster's moveset includes clear tells that cue the player to incoming attacks, it won't always be easy to evade them. Thankfully, Samus has opportunities to restore health and ammunition, should players sustain significant damage.
Breaking Down the Fight Against Experiment No. Z-57

Experiment No. Z-57 has a decent repertoire of attacks. The basic attacks consist of swiping at Samus with one of its primary limbs or shooting a beam from its mouth. The individual limb swipes cover roughly three-quarters of the screen at a diagonal. The double limb swipe, while rare, leaves open only a small section by Z-57's head.
Z-57 has two beam attacks. The first is intermittent and fires downward, leaving pink goo in its wake. When Z-57 jumps onto a wall, the beam will cover everywhere except a small section above or below Z-57's head. Players must avoid damage during this second beam section to trigger a move that Samus can counter. Successfully countering this attack will lead to a grab sequence.
The grab sequence allows Samus a chance to deal significant damage to Experiment No. Z-57. It also leads into an attack where Z-57 will unfurl its secondary limbs and latch them onto the sides of the room opening. This gives players a chance to destroy its secondary limbs, which in turn disrupts Z-57 from the attack it's charging.
The battle cycles through these moves with the addition of one more after Samus destroys a limb. Z-57 will cover one wall with pink goo and shoot crescent shaped beams from the other side. Players will need to use Samus's space jump while Speed Boosting to avoid these attacks.
Strategies to Defeat Experiment No. Z-57

Players can anticipate the limb swipes by noting when Experiment Z-57 removes its arms from their grip against the walls. Z-57 will not repeat the same side it just swiped from twice in a row, so players can safely use the space jump to go from the top left or right corner as necessary. In case of a double swipe, players will want to stay close to where Z-57's head is.
When Experiment Z-57 fires the beam from the top of the screen, players need to wait for the first shot to end. The pink goo is generally spread out to perfectly accommodate a combined jump and Flash Shift, but players will need to gauge the distance in case Samus goes too far or not far enough. Players can then shoot at Z-57 while it finishes covering the rest of the room. When Z-57 fires the beam from the wall, players should be close to its head, as it cannot angle the beam down far enough to reach Samus from that point.
After the grab sequence, watch for Z-57 to grab onto the walls with its secondary limbs. Since Z-57 is charging an attack to fire at Samus, players will not be able to lock onto all four limbs with the Storm Missiles. Firing a barrage of Storm Missiles at one limb will destroy it and disrupt Z-57, leaving enough time to quickly charge a second barrage and destroy a second limb.
The toughest attacks to evade are the crescent beams from the Speed Boost section. The crescent beams are typically stacked two or three high, requiring Samus to maintain her space jump throughout the sequence. It's hard but not impossible to avoid all of the beams. In general, players can expect to take the most damage during this section, but any health lost here can be regained elsewhere in the battle.